Sunday, November 3, 2013

Soft Pretzels

Click me for a close up view of my yumminess!
When I first saw this recipe in the October edition of the Food Network magazine I just knew I had to try it. Even though it looked slightly challenging I felt it would be worth the effort. Boy was I right. These are absolutely addictive, like fresh bread out of the oven on steroids.

Surprisingly they were actually not that difficult to make. The most challenging part for me was shaping the thing to resemble a pretzel, which (maybe due to my lack of artistic skill) was completely puzzling for me, even with step by step pictures. Regardless, even if some were misshapen they still tasted like heaven.

For 12 pretzels
Ingredients

  • 3 tbsp unsalted butter, cubed and at room temperature
  • some melted butter for brushing
  • 2 tbsp packed brown sugar
  • 2 ¼ tsp of active dry yeast
  • 6 cups all-purpose flour
  • 2 tsp kosher salt plus more for sprinkling
  • 2/3 cup baking soda

Step 1: Activating your yeast


Mix together in the bowl of a stand mixer 2 cups of warm water (I heated cold water on high for 1 minute in the microwave) with the cubed butter and brown sugar. Sprinkle the yeast on top and let stand until foamy, about 10 minutes.
Before
After 10 minutes
If the yeast doesn't foam, it's either too old of you did something wrong. If it's the former, buy new yeast, if it's the latter, discard and start again.

Step 2: Starting the dough

Add 3 cups of the flour and 2 teaspoons of salt to the yeast mixture. Remember the rules when measuring flour. Do not dip your cup in the flour. Instead, pour the flour in your measuring cup until overflowing (without tapping) and use a knife to level it off. If you don't do this you risk putting in too much flour which in turn will make your dough too dry.
With the hook attachment, mix on low until the flour is incorporated and increase the speed to medium.
Dough after first 3 cups of flour
Add the rest of the flour at low speed once again. Increase the speed to medium. At this point your dough should gather into a ball and pull away from the sides. Let run for roughly 5 minutes
After 6 cups of flour, kneaded for 5 minutes
Brush a metal bowl with some melted butter and add the dough, coating it in the butter. Cover with a plastic wrap and let rise for an hour or until doubled in size.
Before

After 1 hour

Step 3: Forming the pretzels

Divide your dough into 12 pieces. Just cut it in half, and cut each half into 6 pieces. 


Measure out a 24 inch piece of string and place on your counter as a guidance. This will be the length you will need to roll out from you pieces of dough. With your hands, take a piece of the dough and roll out from the middle outwards until it reaches the length of the string.
Once at the right length, take the rope of dough and form into a U and twist 2 times in the middle. Fold the ends over and attach them to the bottom of the U.

It's a little rough, but you get the idea.
Place on an aluminum foil lined baking sheet (coated with cooking spray) and repeat with the rest of the dough pieces. You should have 3 baking sheets with 4 pretzels on each. Once completed, cover your sheets with plastic wrap and let the pretzels rise for 30 minutes.

Step 4: Boiling/Baking the pretzels

While the pretzels are rising, preheat your oven to 425°F and place one oven rack in the top third of the oven, and another in the bottom third. Bring 10 cups of water to a simmer with the baking soda, whisking it to dissolve it completely in the water.
Once your 30 minutes are up, carefully peel the pretzels away from the baking sheet and slip them into the simmering water. Simmer for 45 seconds and carefully flip them over to simmer for another 45 seconds. Use a slotted spoon to remove the pretzels and place them back on your baking sheet. Do this in batches of 3 or 4.
This step is actually the secret to making the pretzels. The baking soda creates a base environment that coats the pretzels. This alkalinity helps along the Maillard reaction, which is the browning of the dough. Simply put, the baking soda bath with help the pretzel brown up faster while baking, Therefore you won't need to bake it as long to have a crusty outside which allows the texture inside to remain soft, and wonderful.
After boiling, ready for the oven
Once all of the pretzels have been boiled, sprinkle them generously with salt and put them in the oven. Bake them for roughly 6 minutes and then rotate the pans in the oven. Bake them for another 6 minutes or until they are sufficiently brown on the outside.
Once out of the oven, brush the top with some melted butter. Wait a couple of minutes and enjoy. They are at their best fresh out of the oven. I dare you to eat just one.
Misshapen and delicious!


Saturday, October 26, 2013

Cauliflower Soup with Crispy Brussels Sprouts and Smoky Caviar

I like contrast in my food and usual combinations that may seem like they should not work well together but do. It's always exciting when a variety of flavours come together create such a surprising successful synergy.
This soup is a great example of this. It combines the creamy mellow flavour of cauliflower (which is a great blank canvas) with the punchiness of crispy-fried Brussels sprouts and the unexpected intensity of smoke infused caviar. Great for a dinner party as the colours of this dish really stand out.
This is adapted from a Tyler Florence recipe from the Food Network magazine.

Serves 6 to 8 people
Ingredients


  • 1 oz or 30 g of caviar (whichever kind you want to use)
  • a few drops of smoke oil
  • 3 cups of cauliflower, in pieces (around 1 small head)
  • 1 onion, chopped
  • 2 sprigs of thyme
  • 6 cups of milk
  • salt & pepper
  • oil for frying
  • 7 Brussels sprouts, separated into individual leaves
  • Fleur de sel
  • 1 tbsp of chopped chive

Step 1: Making your caviar smoky

I found this smoke oil at my butcher's. You can probably find something similar in some grocery stores. Just mix a few drops in the caviar until it tastes sufficiently smoky (this is very individual). Keep covered in the fridge until ready to use.

Step 2: Making the soup

Sauté your onions in a large pot with some oil on medium heat until softened. Add your cauliflower, milk, and thyme.
Cover and simmer for 25 to 30 minutes, until the cauliflower is soft. Discard the thyme sprigs. Let cool slightly and blend with hand blender or traditional blender until smooth. Season with salt.

Step 3: Preparing the Brussels sprouts


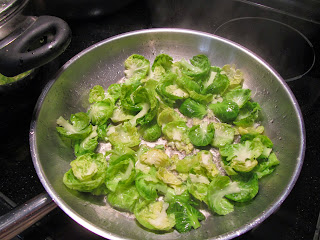
Fill a medium sauce pan with an inch of oil. Heat on medium to medium-high heat and fry the Brussels sprouts leaves for a few seconds until slightly crispy. Drain on a paper towel and season with the fleur de sel.
If you don't have fleur de sel just use regular salt. Fleur de sel just adds a nice crunchy texture to the Brussels sprouts but it's entirely optional.

Step 4: Assembling the soup

Once all the previous steps are done, ladle the soup in two the vessels of your choice and garnish with the fried Brussels sprouts. Sprinkle on the chives, smoky caviar and freshly cracked black pepper.

Saturday, April 6, 2013

Mulligatawny soup

Mulligatawny is an Anglo-Indian soup that is curry based. There are countless variations but this recipe is my own. A shout out goes to Ganges in NDG whose Mulligatawny has greatly inspired this one. I've had a lot of request for this recipe so I'm glad to share it. You may be put off by the amount of spices needed to complete it, but they are so worth it and this soup is really not complicated once you have them.

You can buy ground spices if you'd like. However, buying them whole and grinding them yourself will give you stronger, fresher flavours.

Servers 6 people
Ingredients

Spices

  • 1 tsp black peppercorns, ground
  • 1 tsp cumin seed, ground
  • 1 tsp mustard seed, whole
  • 1 tsp red pepper, ground
  • 1 tsp of turmeric, ground
  • 1 tsp of coriander seed, ground
  • 1 cinnamon stick, whole
  • 3 cloves, whole 
  • 4 green cardamoms, whole
  • 1 tsp of black caraway seeds, whole (optional)
  • 1/2 tsp of curry powder
Soup
  • 1/2 cup of yellow split peas
  • 3 tbsp of ghee (clarified butter) or regular butter
  • 2 garlic cloves, minced
  • 1 inch piece of ginger, minced or grated
  • 1 large onion, chopped
  • 2 carrots, diced
  • 2 parsley roots (or parsnips if you can't find this), diced
  • 3 tbsp of all purpose flour
  • 2 potatoes, cubed
  • 6 cups of vegetable of chicken broth
  • 1/2 cup of coconut milk
  • juice of 1 lemon
  • 1 large handful of fresh cilantro

Step 1: Cooking the yellow split peas

Rinse the split peas thoroughly under cold water. Place in a saucepan with 2 cups of water. Bring to a boil and simmer, covered for roughly 45 minutes until the split peas fall apart. Drain and set aside. You can begin the rest of the soup during this cooking time.

Step 2: The spices and soup base

Mix all the spices in a small bowl.
Melt the ghee or butter in a large saucepan on medium heat. Add the garlic, ginger, and onions and cook for roughly 5 minutes, until the onions have softened. Add the carrots and parsley root (or parsnip) and cook for another 5 minutes.Add your spice mix and cook for 1 minute, until fragrant.
Add the flour and mix and cook thoroughly for 2 minutes. You've just created a roux which will help thicken your soup and give it more texture. Slowly add your broth to the saucepan, stirring constantly.
Keep stirring while bringing the broth to a boil. To quicken this process, you can always boil your broth separately before using it. A whisk is quite helpful as well at this point. Once your broth starts boiling, you'll notice that it will thicken as well. 

Add your potatoes, lower the heat and cover the pan. Simmer until tender, around 15 minutes. Fish out and remove the cloves, cardamom pods and cinnamon stick. You can always leave them in, but your guests may not appreciate biting into something hard when eating the soup. Add the split peas, coconut milk and lemon juice. 

Heat through. When ready to serve, add the cilantro. If you add the cilantro too early, it will lose all of it's brightness and freshness.
Serve hot with fresh naan bread and a wedge of lemon per bowl. 

Saturday, March 16, 2013

Creamy Caramel Cheesecake


I love this cheesecake. I don't post many desserts since I don't have much of a sweet tooth. So it came as a surprise to me how much I enjoyed this recipe and wanted to share it with you. It's made with toffee bits which are melted in the cheese batter as it bakes. I also love the unexpected and pleasant surprise of a thin layer of chocolate between the crust and the cheesecake filling.

This recipe is adapted from the Bite Me recipe book by Julie Albert and Lisa Gnat.

Feeds 12 people
Ingredients

  • 1 1/2 cups of Graham baking crumbs (original recipe calls for Oreo crumbs, so pick whatever you prefer)
  • 1/2 cup of melted butter
  • 1/4 cup whipping cream
  • 1 cup semi-sweet chocolate
  • 4 x 250g packages of cream cheese, room temperature
  • 1 cup of sugar
  • 4 large eggs
  • 1 1/2 tsp of vanilla extract
  • 2 cups chopped toffee bits (see picture below for reference)
  • 1/4 cup caramel sauce (store bought or you can make your own)
Found in most grocery stores

Step 1: The crust

Preheat your oven to 350°F. Take a 9 inch loose bottom pan and wrap the outside with aluminum foil. This helps prevent any messes caused by potential leaking from the cake. Mix the baking crumbs with the melted butter and press this mixture over the bottom and halfway up the sides of the pan.
Melt the chocolate with the whipping cream in a saucepan and pour evenly over the crust. Chill the crust in the fridge while you prepare the filling.

Step 2: The filling

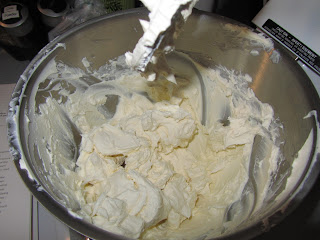
With an electric mixer, beat the cream cheese together until smooth.
Before
After!
Gradually add the sugar to the cheese and mix together. Add the eggs one at time until well blended in.
Your filling should have more of a liquid consistency now. Don't forget to scrape the bottom of your mixing bowl once in a while to make sure there isn't any unmixed clumps of cream cheese stuck there. Add the vanilla extract and mix in the toffee bits.

Step 3: Baking the cake

Your filling is now complete. Pour it into your pan on top of the prepared crust. Spoon the caramel sauce over the top of the filling. Don't worry if some of it sinks in, it will still taste good!
Place your pan on a baking sheet on the medium rack of your over. Bake for 1h15 minutes. Depending if you have a convection oven or not, you may require more time. Mine needed maybe another 10 minutes more than this time to be completely set in the middle.
Remove from the oven and let the cheesecake cool to room temperature. Cover with a plastic wrap and chill for several hours before serving. The longer the better. Enjoy!

Sunday, March 3, 2013

Jamie Oliver's Salmon en Croûte

I recently made this recipe for a group of friends and the feedback was positive enough for it to warrant some writing space on my blog. It is adapted from Jamie Oliver's Food Revolution cookbook (which has great, unpretentious and no-nonsense recipes). It's basically salmon with various toppings including cheese cooked in puff pastry. Salmon has a robust enough flavour to not be overpowered by the savory ingredients of this recipe.

Feeds 6 people
Ingredients

  • 800g salmon fillet (I remove the skin but you can leave it on if you prefer)
  • 1 package of puff pastry (I use Tenderflake, thawed)
  • some flour for dusting
  • olive oil
  • salt and pepper
  • 1/4 cup of tapenade (black olive paste)
  • fresh basil leaves
  • 2 ripe tomatoes, sliced
  • 4 regular size bocconcini (fresh mozzarella), sliced
  • 1 egg

Step 1: Preparing the puff pastry

Preheat your oven to 400°F. It's good to work quickly with puff pastry because keeping the dough cold will yield better results. Roll it out using a rolling pin and some flour to prevent it from sticking. Roll it out to the same size as the pan you will be using, roughly 6" by 12".  

Step 2: Preparing the filet and the toppings


Season your fillet with salt and pepper and a little drizzle of oil.
Place the fillet seasoned side down in the middle of the puff pastry. My fillet is extra big because I was feeding many people. 
Spread on the tapenade.
Then place your basil leaves on the fish, along with the sliced tomatoes and bocconcini pieces. Sprinkle with more salt and pepper and drizzle again with olive oil.

Step 3: Baking your salmon

Gather up the edges of the puff pastry around the salmon fillet and brush the pastry with some egg wash.
Place in the over (middle rack worked fine for me, but Jamie Oliver recommends to put it at the very bottom of the oven). Place an empty pan on the rack above your salmon to protect the top from over browning. Bake for roughly 35 minutes and there you have it!